Page 1 of 4 1234 LastLast
Results 1 to 40 of 124
  1. #1
    Senior Member joshuagore's Avatar
    Join Date
    07.21.09
    Location
    Volo/Round Lake
    Posts
    129
    Liked: 0

    Default The Project Begins..

    Against the advice of almost everyone I not only got a Vee, but also the one said not to get(see this thread). That being said it was purchased for $1000 which included a fairly nice open trailer, spare engine/trans, spare hoop forward bodywork, good cell, fire system, and what I am told is a regional motor.

    The car was purchased full well knowing that I would not fit as is. In fact it was purchased without knowing what I would even do with it, or if I would really even bother with racing a Vee...

    Well after consulting a few experts, I was divided on what to do. Sell the chassis, find a wider chassis and swap the parts, or make it work. On one hand I was told the vintage chassis was worth something, and on the other hand, it has no logbook and no visible stamp on the roll bar.

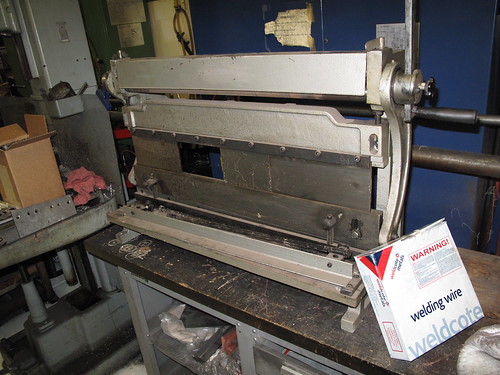
    My decision hinged on my goals. My goal is to get out on the track, even if it's just with MCSCC. Yes I know there are cheaper ways of getting on the track. So a new roll hoop, and upper frame section is now on order with the bender. Wider and updated as per the rules.

    I want to thank everyone for there advice and kind words. I don't expect cheering from you guys after I effectively ignored all your advice, but I figured I owed you at least a play by play. If it turns out to be the predicted nightmare, it will be documented here, and I fully expect criticism.

    To rest some fears, I am being aided in this by some seasoned veterans, and although they may not be V guys anymore, they have spent more hours building cars than I have spent alive. They also know more intimately where I am coming from.

    So on to day 1(technically day 2 if you include a night of planning, measuring, planning, and measuring)

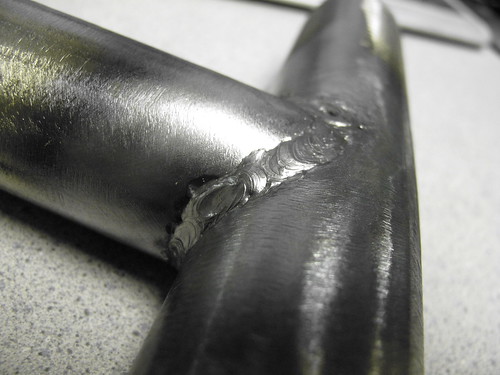
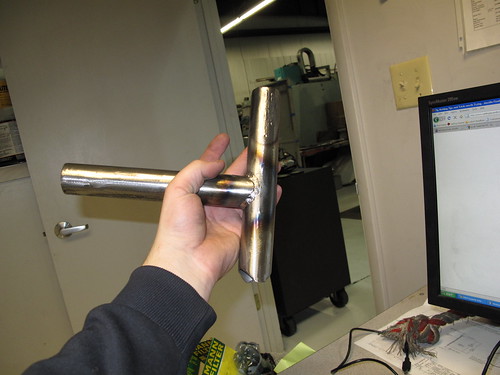
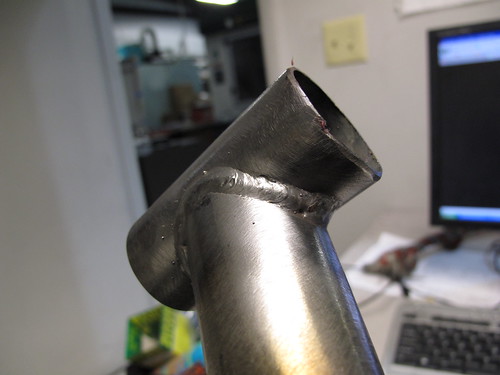
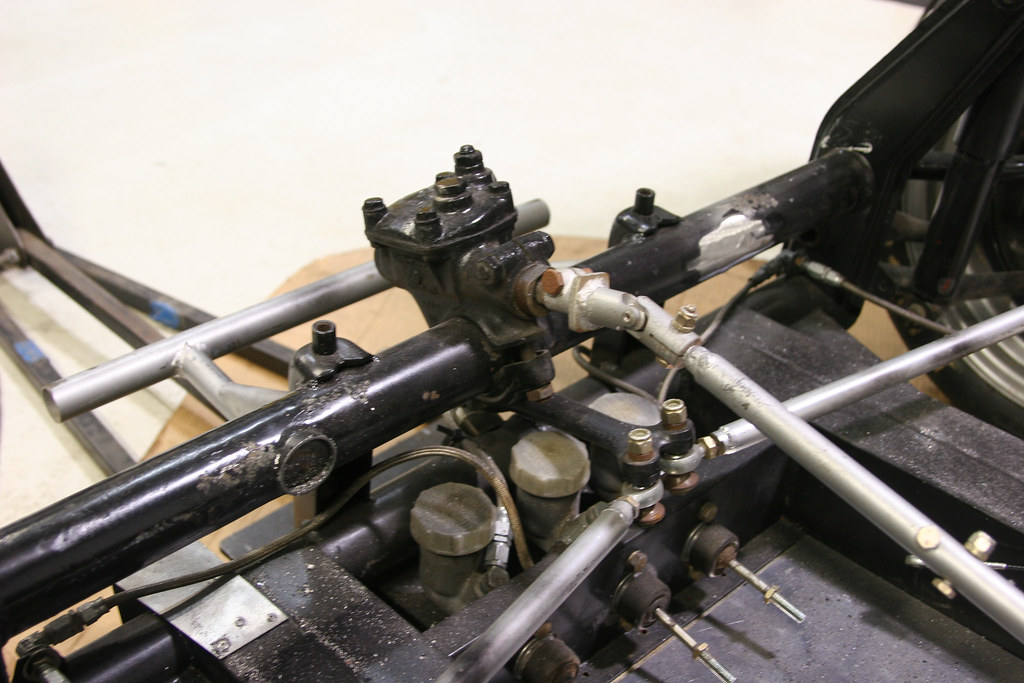
    I removed the cell, brakes, firewall, wiring, pedals(need to be changed), and cut the upper frame off. I then cleaned everything smooth. The wider base of the bar might require that I extend the main roll hoop plates, but I hesitated to go that far until I had the bent tube in front of me.

    Here are some pictures...


  2. #2
    Senior Member
    Join Date
    07.01.07
    Location
    Northern NJ
    Posts
    204
    Liked: 7

    Default

    For that price, you can't go wrong!

    I bought a "Project FV" a few years ago, much the same situation as your car, and it worked out well for me. I probably broke even at this point, but the benifit is you will be so fimiliar with the car that maintaining it, or dealing with problems down the road will be easier, and cheaper to manage.

    Can't wait to see how it comes out! Keep the pics comming!

  3. #3
    Global Moderator carnut169's Avatar
    Join Date
    01.22.02
    Location
    Atlanta, Ga
    Posts
    3,700
    Liked: 11

    Default

    X2! $1000? Geez, that's a bargain for any race car, and although I know nothing about V's it would seem all the parts should be worth more than that, no?
    Sean O'Connell
    1996 RF96 FC
    1996 RF96 FB
    2004 Mygale SJ04 Zetec

  4. #4
    Senior Member rickjohnson356's Avatar
    Join Date
    07.31.02
    Location
    decatur, GA
    Posts
    1,484
    Liked: 0

    Default well, ok good price

    ok, for one grand, you did get your money's worth.

    an added plus, by the time you finish, your fabricating skills will be much improved!

    don't be concerned about going against the advice of the other posters. you are the one who determines the outcome of this adventure.

    I certainly have made some "bad" race car purchases, but have learned a lot and don't really regret any of the experiences I have had. (except selling my 356SC)

    So, bottom line--- go for it and make your dreams of driving on the track come alive!

    keep coming back to Apex as the questions come up--- everyone will be happy to help you "get 'er done"

  5. #5
    Senior Member dd46637's Avatar
    Join Date
    02.01.07
    Location
    south bend in
    Posts
    275
    Liked: 3

    Default

    I say well bought!

    As you go along don't be afraid to ask questions if you need to because when your getting started the only dumb question is the one you were afraid to ask.

    Good Luck with your project and welcome to the brotherhood.

    Dave

  6. #6
    Senior Member joshuagore's Avatar
    Join Date
    07.21.09
    Location
    Volo/Round Lake
    Posts
    129
    Liked: 0

    Default

    Day 2

    Tonight I plan on placing the cell temporarily back in the car in an effort to sort out my seating position. It is inevitable that I am going to be more upright to make room for my legs in this shorter car. The only problem with this is fuel cells angle is more layback and less upright. I want to dope this all out before welding in any horizontal bars or cutting the 'length' of the extra material left on the bottom of my main and front hoop from the bender.

    I am also going to take measurements from the firewall forward and model everything up. This should help to understand the packaging, and give me a good cut list for when I have to notch the tubes.

    Josh

    p.s. Lets here some thoughts on this goofy roll hoop.


  7. #7
    Grand Pooh Bah Purple Frog's Avatar
    Join Date
    04.03.01
    Location
    Havana, Fl, USA
    Posts
    10,777
    Liked: 3787

    Default

    If you move the master cylinders in front of the torsion bar tubes, you'll have lots of leg room. Then you can lay down and take advantage of that fuel cell.


  8. #8
    Global Moderator Bill Bonow's Avatar
    Join Date
    08.18.02
    Location
    Plainfield, IL
    Posts
    2,663
    Liked: 190

    Default The Purple one is all knowing

    Listen to the frog, he speaks the truth
    Bill Bonow
    "Wait, which one is the gas pedal again?"

  9. #9
    Senior Member joshuagore's Avatar
    Join Date
    07.21.09
    Location
    Volo/Round Lake
    Posts
    129
    Liked: 0

    Default

    It looks to me like moving the masters forward might require also relocating the steering arm to realize any big gains. I have looked at other steering setups with likages and the arm relocated to the front, but that seems like more hassle than its worth?

    As of right now my cell will work just fine, it will just require some extra padding below my butt.

    Josh

  10. #10
    Senior Member joshuagore's Avatar
    Join Date
    07.21.09
    Location
    Volo/Round Lake
    Posts
    129
    Liked: 0

    Default

    The red is what I am changing, the black is the current frame, and the clear body was a quicky model just to dream of the day I order a bunch of foam and beg my brother to cnc a bunch of blocks for a plug.

    I really don't think I will be doing this much bending with the braces around the cockpit, but its easier to model those than it will be to do them, so I figured if I can simplify in reality after I get a better lay of the land.

    Josh


  11. #11
    Grand Pooh Bah Purple Frog's Avatar
    Join Date
    04.03.01
    Location
    Havana, Fl, USA
    Posts
    10,777
    Liked: 3787

    Default

    Mount the steering box between the tie rods and the steering wheel. Then you have no steering arm in the foot well. Been done many times. Works great. In fact you can eliminate a lot of bad steering rod angle. Especially good for you to do since you are already rebuilding all the upper rails,


  12. #12
    Global Moderator Bill Bonow's Avatar
    Join Date
    08.18.02
    Location
    Plainfield, IL
    Posts
    2,663
    Liked: 190

    Default More room is better

    Josh,

    In attempting to get more leg room, you could move the master cylinders back to the front roll hoop bulkhead. The Citation FV used this general idea to operate the hydraulics via pull rod. You're making new pedals anyway, right? This and the Frogs suggestion of the steering box inverted behind the dash, will allow the pedals to be mounted as close as possible to the beam. It would not add much fabrication to your project and it should give you plenty of additional room.
    Bill Bonow
    "Wait, which one is the gas pedal again?"

  13. #13
    Senior Member
    Join Date
    09.04.02
    Location
    Livonia,Mi.
    Posts
    202
    Liked: 19

    Default

    Josh,

    agreed with frog and bill, the Vector has the the master's in front of the beam and the s/box inverted, in front of the front roll hoop lots of room.
    Terry Abbott

    2-Vector FV's
    1-SM Miata

  14. #14
    Senior Member
    Join Date
    04.22.08
    Location
    sacramento, ca
    Posts
    790
    Liked: 72

    Default

    It's 6 of one, half dozen of another. I prefer the steering box in front of the hbeam with the hydraulics under my legs in front of the seat. I never wanted to doe se doe with a steering box and my knees. Most inverted steering systems require you put your feet in front of the tie rods. A easy toe buster in a shunt. Plus, bump steering a donkey di$% pitman arm will prove to be quite a challenge. The fewer parts the better. Make a tube for the box and mount it to the hbeam holes. Build a pitman arm that extends underneath and puts the tie rods very close to the hbeam. They'll be out of your way and will zero out on bump.
    The above post is for reference only and your results may vary. This post is not intended to reflect the views and opinions of SCCA and should not be considered an analysis or opinion of the rules written in the GCR. thanks, Brian McCarthy, BOD area 9.

  15. #15
    Senior Member joshuagore's Avatar
    Join Date
    07.21.09
    Location
    Volo/Round Lake
    Posts
    129
    Liked: 0

    Default

    Tonight I will attempt to do this and see what I end up gaining. It did come to mind, but the cars I have seen it in required some sort of linkage/lever tie rod setup.

    Any pictures?

    Josh

  16. #16
    Contributing Member provamo's Avatar
    Join Date
    05.24.04
    Location
    Amherst, New York but i left my heart in San Francisco
    Posts
    2,650
    Liked: 292

    Default congratulations!

    looks better in your shop than in previous post

  17. #17
    Senior Member joshuagore's Avatar
    Join Date
    07.21.09
    Location
    Volo/Round Lake
    Posts
    129
    Liked: 0

    Default

    The front roll hoop I had bent is not 'complete' in that it terminates at the horizontal upper frame rails, and proceeds to go down to the lower boxed frame with an independent tube. This is illegal as I read it?

    Josh

    p.s. Worlds biggest roll hoop.

  18. #18
    Contributing Member problemchild's Avatar
    Join Date
    10.22.02
    Location
    Ransomville, NY
    Posts
    5,731
    Liked: 4353

    Default

    I would urge you to go look at some other FVs with different steering systems before trying to copy them. In building my new car, I recently went through this exercise, and found that each had its advantages and disadvantages. Packaging within limitations of beam height, bodywork height, body width, and driver size make some more suitable to some. There are 5 common setups:
    1) standard VW (as this car was)(most common)
    2) Citation set-up
    3) Adams set-up
    4) inverted strg box behind the dash (2nd most common)
    5) strg box in the nose
    As Brian said, 6 of one and half a dozen of another. He prefers #5 and dislikes #4. In a recent FST steering discussion, Steve Lathrop commented on the positive performance of the Citation and Adams designs. My preference was for #4, ironically for the exact reasons Brian dislikes it, but I was intimidated by the custom extended pitman arm issue (never seen one that did not break eventually), and I committed to the Adams set-up.
    Although you can discuss the merits of each, the success rate of #1 is unparalleled. I do not know what was on the 2009 Runoff winner, but I believe it was 13 of the previous 14 Runoffs used the conventional VW configuration. One for Adams, is the only exception I can think of since the Runoffs moved to Mid-Ohio.
    Although, "just a vee", there is a lot going on that may not be so obvious on the surface. I would suggest copying a very specific car, if changing from #1.
    PS .... #1 is the lightest!
    Greg Rice, RICERACEPREP.com
    F1600 Arrive-N-Drive for FRP and SCCA, FC SCCA also. Including Runoffs
    2020 & 2022 F1600 Champion, 2020 SCCA FF Champion, 2021 SCCA FC Champion,
    2016 F2000 Champion, Follow RiceRacePrep on Instagram.

  19. #19
    Senior Member joshuagore's Avatar
    Join Date
    07.21.09
    Location
    Volo/Round Lake
    Posts
    129
    Liked: 0

    Default

    Quote Originally Posted by problemchild View Post
    I would urge you to go look at some other FVs with different steering systems before trying to copy them. In building my new car, I recently went through this exercise, and found that each had its advantages and disadvantages. Packaging within limitations of beam height, bodywork height, body width, and driver size make some more suitable to some. There are 5 common setups:
    1) standard VW (as this car was)(most common)
    2) Citation set-up
    3) Adams set-up
    4) inverted strg box behind the dash (2nd most common)
    5) strg box in the nose
    As Brian said, 6 of one and half a dozen of another. He prefers #5 and dislikes #4. In a recent FST steering discussion, Steve Lathrop commented on the positive performance of the Citation and Adams designs. My preference was for #4, ironically for the exact reasons Brian dislikes it, but I was intimidated by the custom extended pitman arm issue (never seen one that did not break eventually), and I committed to the Adams set-up.
    Although you can discuss the merits of each, the success rate of #1 is unparalleled. I do not know what was on the 2009 Runoff winner, but I believe it was 13 of the previous 14 Runoffs used the conventional VW configuration. One for Adams, is the only exception I can think of since the Runoffs moved to Mid-Ohio.
    Although, "just a vee", there is a lot going on that may not be so obvious on the surface. I would suggest copying a very specific car, if changing from #1.
    PS .... #1 is the lightest!

    On this car I am doing as little changing to parts that move.. as possible. This means it will stay #1. On my next car if I decide to keep in vee's I have some ideas I want to execute, but for now, when working with what I have and my time constraints, its about the chassis, and fit.

    I am on my way to pick up a combination sheer/break/roller for nearly free. Last night I attempted to convert a kinker to a tube bender... It was a success so long as you don't go beyond 45 degrees.

    Josh

  20. #20
    Senior Member smsazzy's Avatar
    Join Date
    12.01.05
    Location
    Seattle
    Posts
    444
    Liked: 16

    Default

    [FONT=Verdana]Was the beam welded directly to the chassis?[/FONT]
    Stephen Saslow

  21. #21
    Contributing Member problemchild's Avatar
    Join Date
    10.22.02
    Location
    Ransomville, NY
    Posts
    5,731
    Liked: 4353

    Default

    Yes, it was .... which meant that the car went back to the builder for an expensive repair. The builder also rarely put guages or warning lights in his cars. Customers were told "Drive it till it stops". The car builder also built engines
    Greg Rice, RICERACEPREP.com
    F1600 Arrive-N-Drive for FRP and SCCA, FC SCCA also. Including Runoffs
    2020 & 2022 F1600 Champion, 2020 SCCA FF Champion, 2021 SCCA FC Champion,
    2016 F2000 Champion, Follow RiceRacePrep on Instagram.

  22. #22
    Contributing Member provamo's Avatar
    Join Date
    05.24.04
    Location
    Amherst, New York but i left my heart in San Francisco
    Posts
    2,650
    Liked: 292

    Default steering shake

    one million years ago when i raced an Autodynamics Mk5 Formula Vee, sometimes a wicjked steering shake would evolve.....any ideas as to what is the root cause of that phenomenon? SOME of the competition had some sort of steering "shock" installed, would that have eliminated the symptom?

  23. #23
    Grand Pooh Bah Purple Frog's Avatar
    Join Date
    04.03.01
    Location
    Havana, Fl, USA
    Posts
    10,777
    Liked: 3787

    Default

    I too noticed the frame welded to the beam. I figured for what Josh is trying to accomplish in the near future it's not an issue. After this major tubing change, he'll have enough experience so that if he bends a beam, he'll be able to fix it better at that time.
    We all know this is not his last race car. He took the pill. The addiction has started. Next will be a motor upgrade. Then in a year or so, the chassis upgrade...


  24. #24
    Senior Member joshuagore's Avatar
    Join Date
    07.21.09
    Location
    Volo/Round Lake
    Posts
    129
    Liked: 0

    Default

    Quote Originally Posted by Purple Frog View Post
    I too noticed the frame welded to the beam. I figured for what Josh is trying to accomplish in the near future it's not an issue. After this major tubing change, he'll have enough experience so that if he bends a beam, he'll be able to fix it better at that time.
    We all know this is not his last race car. He took the pill. The addiction has started. Next will be a motor upgrade. Then in a year or so, the chassis upgrade...

    Its as though you read my mind. I am about to setup a test tube in the bridgeport with my 1 3/8 endmill.
    On another note, does anyone mig these cars? I have far more mig(than tig) experience and the thought popped into my head.

    Josh

  25. #25
    Global Moderator Bill Bonow's Avatar
    Join Date
    08.18.02
    Location
    Plainfield, IL
    Posts
    2,663
    Liked: 190

    Default

    Josh,

    Any welding process is fine as long as it is performed properly. Many FV & FST chassis are MIG (GMAW) welded and work just fine. If your comfortable with MIG, you'll be just fine. Remember, its your hide those welds will be saving .
    Bill Bonow
    "Wait, which one is the gas pedal again?"

  26. #26
    Grand Pooh Bah Purple Frog's Avatar
    Join Date
    04.03.01
    Location
    Havana, Fl, USA
    Posts
    10,777
    Liked: 3787

    Default

    mig?, tig? These cars are using pre-WW2 motors! Most original FVees were stick welded. ...or brazed...


  27. #27
    Senior Member joshuagore's Avatar
    Join Date
    07.21.09
    Location
    Volo/Round Lake
    Posts
    129
    Liked: 0

    Default

    Thanks for more great advice, I am about to start tigging. I prepped 2 scrap tubes for weld testing. My TIG welders size, and my experience is the concern with tig.

    Will report on my findings.

    Josh

  28. #28
    Senior Member joshuagore's Avatar
    Join Date
    07.21.09
    Location
    Volo/Round Lake
    Posts
    129
    Liked: 0

    Default

    Here is where I am at... not very impressive I know.

    Josh


  29. #29
    Grand Pooh Bah Purple Frog's Avatar
    Join Date
    04.03.01
    Location
    Havana, Fl, USA
    Posts
    10,777
    Liked: 3787

    Default

    Its a shame you don't have a big stiff table to clamp that frame to before you start welding. But then, come to think of it, with a zero roll stiffness rear suspension, it may not matter if the frame twists a bit.


  30. #30
    Contributing Member provamo's Avatar
    Join Date
    05.24.04
    Location
    Amherst, New York but i left my heart in San Francisco
    Posts
    2,650
    Liked: 292

    Default practice makes "better"

    find a local TIG expert to give you some lessons

    you are not "coining" enough material and your "path" seems inconsistent

    you do have the basic idea and at least when you TIG you actually have more control of the weld and get to "see" whats going on

    what do your "fishmouths" look like before you weld them?

  31. #31
    Senior Member joshuagore's Avatar
    Join Date
    07.21.09
    Location
    Volo/Round Lake
    Posts
    129
    Liked: 0

    Default

    Quote Originally Posted by provamo View Post
    find a local TIG expert to give you some lessons

    you are not "coining" enough material and your "path" seems inconsistent

    you do have the basic idea and at least when you TIG you actually have more control of the weld and get to "see" whats going on

    what do your "fishmouths" look like before you weld them?

    My fishmouths look about as close as you can get to perfect. I take an endmill the diameter of the tube and plunge it from above in steps of about .100 until I am at the center of the tool. Touching the tool off the edge of the tube and zeroing the digitals on the mill.

    All of my tig practice has been with no fill, it is for this reason that my welds look unsteady. Since that last post I did this mig. It was done in 4 segments, I believe it could be done in 2 if I practiced more, and 1 if I did it for a living.


    You can see the start and stop in this one, clear as day.


    Notching

  32. #32
    Senior Member joshuagore's Avatar
    Join Date
    07.21.09
    Location
    Volo/Round Lake
    Posts
    129
    Liked: 0

    Default

    Quote Originally Posted by Purple Frog View Post
    Its a shame you don't have a big stiff table to clamp that frame to before you start welding. But then, come to think of it, with a zero roll stiffness rear suspension, it may not matter if the frame twists a bit.


    I will have a big stiff table to clamp it to. I will not be doing it on the ground, my back would be killing me

    Josh


    My new toy, should help make that cell enclosure... Not bad for $150

  33. #33
    Contributing Member provamo's Avatar
    Join Date
    05.24.04
    Location
    Amherst, New York but i left my heart in San Francisco
    Posts
    2,650
    Liked: 292

    Default inspection

    for fun cut through your "test" weld and check out the penetration

  34. #34
    Senior Member joshuagore's Avatar
    Join Date
    07.21.09
    Location
    Volo/Round Lake
    Posts
    129
    Liked: 0

    Default

    Quote Originally Posted by provamo View Post
    for fun cut through your "test" weld and check out the penetration
    Good idea I will do this on the band saw tomorrow.
    Josh

  35. #35
    Senior Member joshuagore's Avatar
    Join Date
    07.21.09
    Location
    Volo/Round Lake
    Posts
    129
    Liked: 0

    Default

    I inspected the welds. They are both very similar in there penetration. The tig has some serious crystallization on the backside as I did not flush it from the back side, and maybe I was to hot? I did notice to much material in the back of the tig weld where there was far to much penetration, this was obviously skill related as it was in several locations where I likely was spending to much time without backing out of the pedal.

    I have decided that the tig will likely create a stronger weld in the hands of someone more experienced, and that this is not the time to make bad welds. The cost of welding an expensive cromo tube poorly is just not my cup of tea. In the future it is my goal to make tig my welding method of choice, but for now, mig will not only work, but will have less costs... meaning I have a spool of wire good for cromo, a full tank on the mig, and will experience less 'bad' welds as my experience level is much higher.

    I could really sum that up as being, cheaper/easier/faster and more reliable at my skill level.

    Tonight I bent up the sheet metal for the cell enclosure. Previously the cell was surrounded by a structure which although probably legal, was really not what I wanted to be laying on. It used the firewall as the 'back', and the sides were wobbly. I wrapped the sides with a sheet also covering the bottom, and decided to make the top only open where the fuel filler cap is located. It probably weighs more, but its fairly clean. Is it required to be easily accessible outside the filler area? I would hate to rive this thing up only to find it must be opened? Luckily my cell is nearly brand new.

    Josh

  36. #36

  37. #37
    Contributing Member rickb99's Avatar
    Join Date
    06.24.02
    Location
    Tacoma, Washington
    Posts
    4,913
    Liked: 210

    Default

    Quote Originally Posted by joshuagore View Post
    .... Is it required to be easily accessible outside the filler area? I would hate to rive this thing up only to find it must be opened? Luckily my cell is nearly brand new. Josh
    No, you can rivet it right in there. Might be a really good idea to shoot a picture of the info ON the cell (type, date) before sealing it in as I think this is the car that still needs homologation papers.

    If they ask for it, you don't have to open it up again.
    CREW for Jeff 89 Reynard or Flag & Comm.

  38. #38
    Senior Member joshuagore's Avatar
    Join Date
    07.21.09
    Location
    Volo/Round Lake
    Posts
    129
    Liked: 0

    Default

    Quote Originally Posted by rickb99 View Post
    No, you can rivet it right in there. Might be a really good idea to shoot a picture of the info ON the cell (type, date) before sealing it in as I think this is the car that still needs homologation papers.

    If they ask for it, you don't have to open it up again.

    I ended up making the 'lid' removable with 4 thumb nuts. This way in the event of a spill it can easily be dried out.
    Josh

  39. #39
    Contributing Member problemchild's Avatar
    Join Date
    10.22.02
    Location
    Ransomville, NY
    Posts
    5,731
    Liked: 4353

    Default

    Those cars had a habit of pushing the rollover bar through the main rail when crashed. I cannot tell from your pics, but there should be a real plate (between the bottom of the bar and the rail/ to help spread the load. Even if you put the tube through the top of the rail already, you could weld a plate on the outside bottom of the rail. Yeah, I know the advice would have been better a week ago, but still better now than later.
    Greg Rice, RICERACEPREP.com
    F1600 Arrive-N-Drive for FRP and SCCA, FC SCCA also. Including Runoffs
    2020 & 2022 F1600 Champion, 2020 SCCA FF Champion, 2021 SCCA FC Champion,
    2016 F2000 Champion, Follow RiceRacePrep on Instagram.

  40. #40
    Senior Member joshuagore's Avatar
    Join Date
    07.21.09
    Location
    Volo/Round Lake
    Posts
    129
    Liked: 0

    Default

    Quote Originally Posted by problemchild View Post
    Those cars had a habit of pushing the rollover bar through the main rail when crashed. I cannot tell from your pics, but there should be a real plate (between the bottom of the bar and the rail/ to help spread the load. Even if you put the tube through the top of the rail already, you could weld a plate on the outside bottom of the rail. Yeah, I know the advice would have been better a week ago, but still better now than later.
    Its on the top with a .1 thick plate on the top of the rail, between the bar and the rail.
    Now its time for notching and fitment. This is the real fun

    Josh

Page 1 of 4 1234 LastLast

Thread Information

Users Browsing this Thread

There are currently 1 users browsing this thread. (0 members and 1 guests)

Posting Permissions

  • You may not post new threads
  • You may not post replies
  • You may not post attachments
  • You may not edit your posts
  •  


About Us
Since 2000, ApexSpeed.com has been the go-to place for amateur road racing enthusiasts, bringing together a friendly community of racers, fans, and industry professionals. We're all about creating a space where people can connect, share knowledge, and exchange parts and vehicles, with a focus on specific race cars, classes, series, and events. Our community includes all major purpose-built road racing classes, like the Sports Car Club of America (SCCA) and various pro series across North America and beyond. At ApexSpeed, we're passionate about amateur motorsports and are dedicated to helping our community have fun and grow while creating lasting memories on and off the track.
Social